PU and epoxy can both protect or decorate silicone keypads, but neither chemistry is automatically the more durable choice. The result depends on the actual formulation, coated area, film build, silicone surface preparation, key geometry, cleaners, wear path, optical requirements, and cure process.
For a key that flexes every time it is pressed, compare one approved PU candidate with one approved epoxy candidate under the same conditions. Polyurethane formulations can cover a wide range of gloss, flexibility and haptics, while epoxy systems can also be formulated or toughened for flexibility. The resin-family name alone is therefore not a lifetime grade.
- 1. Define the Coated Area and Finish Objective
- 2. Compare Surface Feel and Appearance
- 3. Review Geometry and Process Compatibility
- Test the flexible geometry, not only a flat coupon
- Control the silicone-to-coating interface
- 4. Use a Same-Condition PU vs Epoxy Qualification Matrix
- 5. Test Wear and Chemical Exposure in a Useful Sequence
- 6. Confirm the Approved Finish with Limit Samples
- Review Your Keypad Artwork and Finish
1. Define the Coated Area and Finish Objective
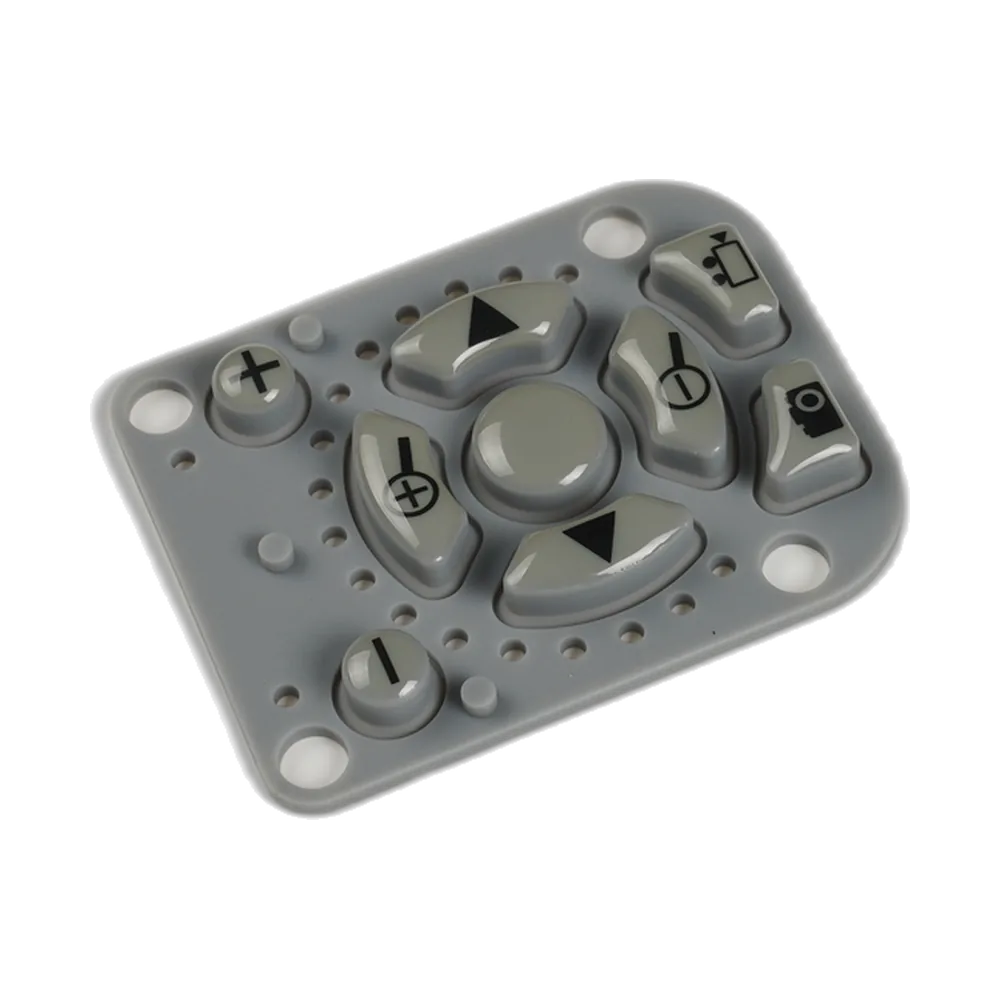
First define what the surface layer must do and where it will be applied. Common constructions include a clear protective topcoat over printed or laser-etched graphics, a pigmented color layer, a full-key clear finish, a local raised resin layer on the key top, or a finish used only on high-wear keys.
These are not equivalent. A thin clear coat over a laser-opened legend sees a different strain state from a thicker local resin dome. The drawing should show whether the coating remains on the flat top, crosses a radius, continues down the sidewall, or approaches the molded web.
Also keep epoxy-coated key tops separate from plastic keycaps. Epoxy is an applied and cured resin feature on the silicone surface. A plastic keycap is a separate molded component with its own retention, fit, tooling and load path.
For broader keypad architecture, see JASPER’s custom silicone rubber keypads page.
2. Compare Surface Feel and Appearance
Specify the finish in observable terms rather than by resin name alone:
- matte, satin or gloss;
- smooth, dry, soft-touch or low-drag feel;
- acceptable finger drag or stick-slip;
- edge height around a local key-top coating;
- scratch and fingerprint visibility; and
- day-view and night-view appearance.
PU coating formulations can be designed to adjust gloss, flexibility, feel and adhesion, including soft-touch finishes. This is why PU is often considered when a flexible or tuned tactile surface is important. It does not establish that any generic PU will adhere to silicone rubber or meet a keypad’s flexing and cleaning requirements.
Epoxy systems also vary. The curing-agent selection can change flexibility, adhesion and chemical resistance, and flexible epoxy formulations exist. These formulation possibilities do not qualify a coating for a keypad; they explain why epoxy cannot be treated as one fixed hardness or durability level.
The real question is: Which exact formulation keeps the approved feel and appearance after flexing, cleaning and wear?
3. Review Geometry and Process Compatibility
Test the flexible geometry, not only a flat coupon
A silicone key is a moving elastomer. The key top may translate, sidewalls bend, and the web repeatedly deforms. A coating that survives on a flat panel can still crack or lift at a radius.
ASTM D522/D522M is a useful flexibility reference because it evaluates cracking of attached organic coatings during bending and includes rubber-type materials in its scope. It can screen a coating system, but it does not replace cycling the production-intent keypad.
Flat witness coupons can still help with gloss, color or film-build measurements. Keep them co-processed with molded keys so coupon data does not replace the real geometry.
Control the silicone-to-coating interface
A useful comparison holds the full surface stack constant except for the intended candidate system. Record:
- molded silicone and cure/post-cure state;
- cleaning and contamination control;
- treatment and/or primer;
- color or masking layers;
- printed or laser-opened legend;
- PU or epoxy protective layer; and
- final cure and conditioning.
The laser-etched silicone keypad route should be reviewed together with the protective finish. Changing primer, cleaning, undercoat or cure while changing resin chemistry makes the result difficult to interpret.
Also review cure temperature, solvent/reactive-component contact with lower layers, wetting at laser edges, bubbles, pooling, mask edges and any effect on translucent or light-blocking layers.
4. Use a Same-Condition PU vs Epoxy Qualification Matrix
The table below is an engineering framework, not JASPER test data. It assumes two project-specific candidates:
- PU candidate: flexible aliphatic PU clear topcoat.
- Epoxy candidate: flexible or toughened clear epoxy system.
Actual grade, primer, film build, cure and acceptance limits remain to be confirmed. Before testing, keep the silicone lot/state, preparation, primer, undercoat/legend stack, coated area, conditioning, key geometry, powered assembly and exposure sequence controlled.
| Comparison area | PU candidate – watchpoint | Epoxy candidate – watchpoint | Same-condition validation |
|---|---|---|---|
| Bending / flexing | Often selected when elasticity is important, but thickness and formulation still control cracking. | Use an explicitly flexible/toughened system; do not assume generic epoxy will flex. | Cycle actual keys and inspect top, radii, sidewall and legend edges for cracking, whitening, edge lift or delamination. |
| Hand feel | Can be formulated from smooth/gloss to soft-touch or lower-drag finishes. | A local build may feel harder or create a detectable edge; flexible grades can differ. | Compare tack, drag, stick-slip, polish and edge feel before and after wear/cleaning. |
| Cleaning / fluids | Resistance varies by PU chemistry and crosslinking. | Resistance varies by resin, hardener, cure and fluid. | Use actual cleaners, disinfectants, oils or other declared fluids; record softening, swelling, discoloration, gloss change, tack and adhesion loss. |
| Gloss / appearance | Matte, satin and gloss directions are possible. | Clear key-top systems may be selected for a glossy appearance, but chemistry name alone does not guarantee gloss. | Use co-processed witness coupons where geometry permits and approve molded keys with visual limit samples. |
| Optical / backlit | Texture, thickness and cure can change transmission, haze, glare and legend contrast. | A thicker local layer can change reflections; bubbles or edge shape may become visible when lit. | Compare the same powered assembly at the same LED drive, ambient light and viewing angle. |
| Adhesion | Strongly affected by silicone preparation, primer, undercoat and cure. | Same issue; a stiffer film can also concentrate stress at edges. | Use an agreed adhesion screen on the real stack, record the failure plane, and repeat after flexing and chemical exposure. |
| Wear / polish | A flexible film can stay crack-free yet polish or change gloss. | A harder surface may resist some scratches yet crack or chip if strain is concentrated. | Combine realistic hand/finger abrasion with relevant contamination; photograph the same areas and retain samples. |
A result is only comparable if the test conditions are comparable. If the two systems require different primers or film builds, document those differences as part of the approved construction rather than hiding them behind the labels “PU” and “epoxy.”
5. Test Wear and Chemical Exposure in a Useful Sequence
Use a sequence that can reveal interaction effects:
- baseline appearance, gloss, touch, adhesion and powered inspection;
- representative key flexing or actuation;
- realistic rubbing/wear;
- declared fluid or cleaner exposure;
- defined recovery/conditioning; and
- repeat appearance, optical, adhesion and mechanical checks.
IEC 60068-2-70 provides a standard method for abrasion of markings and lettering caused by rubbing of fingers and hands, including actuator and keyboard surfaces. IEC 60068-2-74 provides a fluid-contamination framework and states that relevant fluids and severities should be selected for the applicable specification rather than applying every listed fluid.
ASTM D1308 is another useful coating reference for changes such as discoloration, gloss shift, blistering, softening, swelling or loss of adhesion. Its continuous-film requirement means it should not be copied uncritically onto every keypad geometry.
For adhesion, ASTM D3359 is widely known but is scoped to relatively ductile coatings on metallic substrates. It notes limited precision data for non-metallic use and does not provide an absolute bond-rupture force. On silicone keys, use a supplier-agreed method and document the failure plane: silicone interface, primer, color layer, clear coat, laser edge or cohesive coating failure.
Do not invent a universal cycle count, cleaner dwell time or pass limit. Those values must come from the product duty and the approved coating system.
6. Confirm the Approved Finish with Limit Samples
Keep controlled physical samples for appearance and touch conditions that are hard to capture with one number, including:
- acceptable matte / satin / gloss range;
- maximum visible texture change;
- acceptable local epoxy edge height and smoothness;
- unacceptable tack or stick-slip;
- acceptable scratch/polish level after wear;
- unacceptable crack, whitening, bubble, pinhole or edge lift; and
- acceptable powered backlight haze, glare and leakage.
The approval package should identify the keypad revision, silicone state, preparation route, coating product/revision, primer, coated area, film-build method, cure, decoration stack, test sequence and retained sample identity.
If formulation, hardener, primer, cure or another critical interface changes, treat it as a controlled change. “Still PU” or “still epoxy” is not proof of equivalence.
Frequently Asked Questions
Is PU always better than epoxy for silicone keypads?
No. PU is often evaluated for flexibility or tuned haptics, but the actual formulation, primer, film build, cure and geometry determine the result. A project-specific epoxy can be the better finish if it passes the required flex, wear, cleaning and appearance limits.
Is epoxy coating always hard and brittle?
No. Flexible and toughened epoxy systems exist. The supplier should identify the actual resin/hardener system and provide data relevant to the intended film and substrate.
Can a coating change keypad feel or actuation force?
Yes. It can change finger drag directly, and a thick or stiff build near a bending radius can affect deformation. Recheck force-displacement behavior on the finished production-intent key when the coating is mechanically significant.
Can we choose from a chemical-resistance chart alone?
No. Data from a rigid coated panel does not prove adhesion, flexing or optical behavior on silicone. Use supplier data to shortlist candidates, then test the complete keypad stack with the actual fluids and geometry.
Which coating is better for a backlit keypad?
Choose by the complete optical stack. The finish must protect the surface without unacceptable haze, glare, color shift, light leakage or weak laser edges. See JASPER’s laser-etched silicone keypad legends and protective coatings guide for the broader stack.
Is an epoxy key top the same as a plastic keycap?
No. An epoxy key top is an applied cured resin feature. A plastic keycap is a separate molded part with different retention, tooling and load-path considerations.
Review Your Keypad Artwork and Finish
Send the current keypad drawing or sample, 2D/3D key geometry, coated-area requirement, artwork, desired texture/gloss, day/night appearance, LED/PCB information if backlit, expected cleaners and contaminants, high-use keys, quantities, and any existing PU or epoxy sample. Unknown items can be marked TBD.
Start from the silicone rubber keypad product family or request a keypad engineering review.
Ready to Start Your Project?
Tell us about your membrane switch, keypad, or graphic overlay requirements. Our engineering team will review your specifications and provide a detailed quote.