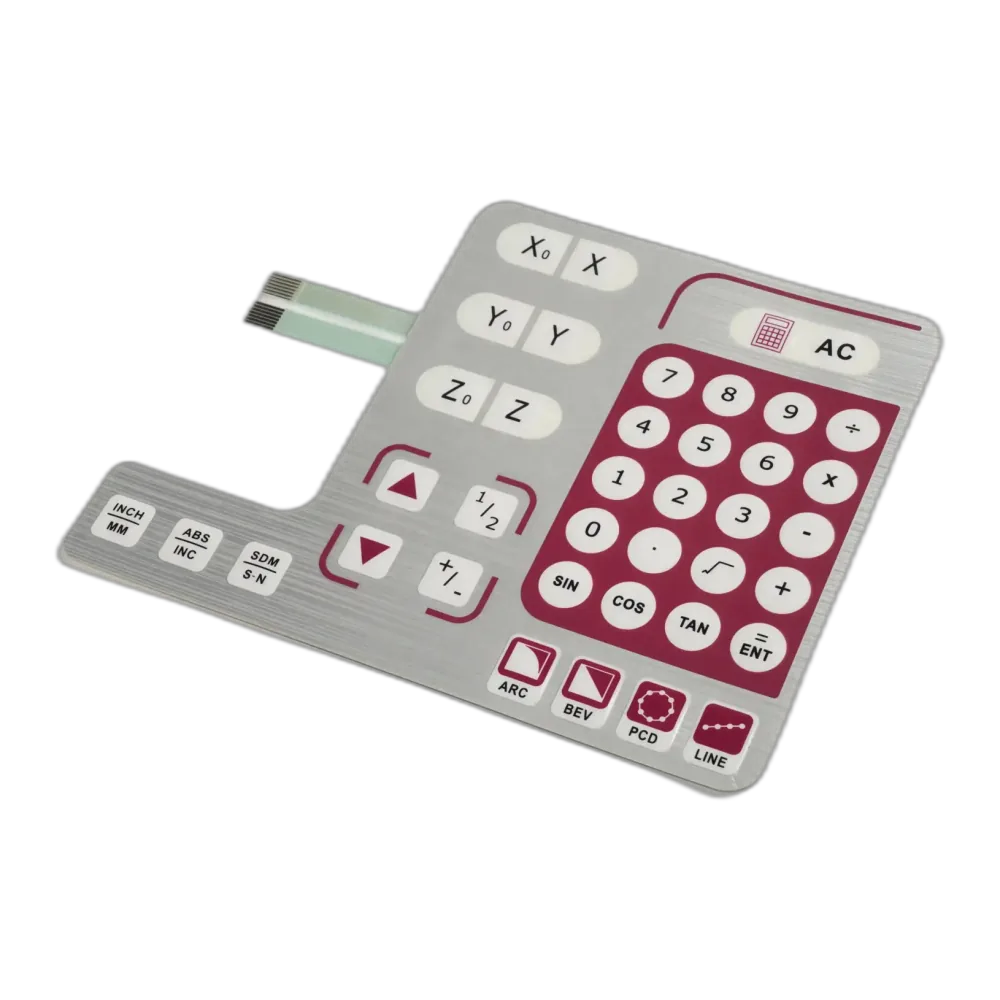
Membrane keypad artwork is the layered, vector-based print file that defines every visible graphic, dead-front mask, embossed area and die-cut outline on the front overlay. Suppliers expect it as a press-ready PDF/X-4 or Adobe Illustrator (.ai) file with Pantone Solid Coated colour calls, 0.125″ bleed and each process element on its own named layer.
Most artwork rejections at a membrane keypad factory happen for the same handful of reasons: the file arrives as flattened CMYK, fonts are still live, the bleed is missing, or layers have not been separated. OEM graphic designers and hardware engineers need production-ready membrane keypad artwork files, with concrete numbers, named standards and a pre-flight checklist that mirrors what a supplier’s pre-press team actually validates before quoting tooling.
- §1 What “artwork” actually means in membrane keypad production
- §2 The 7-step artwork preparation workflow
- §3 Choosing the right file format: Illustrator, PDF/X-4, EPS, CorelDRAW
- §4 Pre-press specifications and standards
- Pantone is the colour language of a membrane keypad
- §5 Pre-flight checklist and the 6 most common rejection reasons
§1 What “artwork” actually means in membrane keypad production
In offset or commercial print, “artwork” usually refers to a single visual layer. A membrane keypad is different. The graphic overlay sits on top of a stack that can include a dead-front display window, embossed key areas, an EMI shield layer, LED light pipes, and a die-cut outline with snap-in tail. Each of those production steps needs its own master pattern, and all of them ship inside the same artwork file.
A complete membrane keypad artwork package therefore contains, at minimum:
- Graphics layer — icons, text, legends, keycap labels, brand marks, all as vector paths on a transparent background.
- Dead-front mask — the opaque area that hides the LCD or LED display when the device is off; supplied as a 100% black vector shape (often named
DEAD-FRONT). - Embossing pattern — outlines of any raised key, rim or pillow emboss; vector lines only, no fills.
- Die-cut outline — the keyway outline plus the tail or cut-off shape, drawn as a single closed path on a
DIE-CUTlayer in a 100% magenta spot colour. - Window cut-outs — clear or coloured transparent zones (display, IR, LED lens).
- Registration / fiducial marks — for layer-to-layer alignment during screen printing and lamination.
- Title block / revision info — file name, revision, designer initials, date, units, printed at 1:1.
These elements are all present in one master file but on separate named layers, never merged.
§2 The 7-step artwork preparation workflow
A repeatable workflow keeps every project moving through pre-press without back-and-forth. The following 7 steps reflect the order most North American and Western European suppliers expect.
Step 1 — Confirm mechanical envelope. Match the artwork board size to the mechanical drawing of the bezel or enclosure opening. The artwork outline is the finished trim; bleed is added outside it. Lock the artboard to that exact size before any drawing begins.
Step 2 — Build the layer structure first. Before placing a single graphic, create the named layers a supplier will look for: ARTWORK-COLOR-01, ARTWORK-COLOR-02 (one per spot colour), DEAD-FRONT, EMBOSS-RIM, EMBOSS-PILLOW, DIE-CUT, WINDOWS, REGISTRATION, TITLE-BLOCK. Naming each printed colour as a separate layer makes screen separation a deterministic export, not an interpretation.
Step 3 — Draw vectors, never embed rasters where vectors will do. Type, line work, icons, logos and shapes must all be vector. The only raster element that belongs on a membrane keypad is a true photographic image, and even then it should be placed at 600 dpi at final print size with no upscaling.
Step 4 — Define colour by Pantone, not RGB or CMYK. Each printed colour is selected from the Pantone Solid Coated (PMS C) library and applied as a named spot colour swatch. Process simulations should not be used because screen-printed inks behave differently from offset four-colour process.
Step 5 — Add bleed, trap and registration. Apply 0.125 inch (3.18 mm) bleed on every printed edge, set automatic trapping at 0.003–0.005 inch (0.076–0.127 mm) between adjacent spot colours, and place three corner registration crosses 0.250 inch (6.35 mm) outside the trim line.
Step 6 — Convert every font to outlines. Highlight all text, run Type → Create Outlines in Illustrator (or Arrange → Convert to Curves in CorelDRAW). Live fonts will not render correctly on a supplier RIP that does not own the licensed font.
Step 7 — Export to PDF/X-4 with layers preserved. Save the master .ai or .cdr for revision history, then export a flattened-transparency PDF/X-4 (ISO 15930-7) that retains the named layers as Optional Content Groups. Send both files. The native file is the source of truth; the PDF/X-4 is the press-ready instance.
§3 Choosing the right file format: Illustrator, PDF/X-4, EPS, CorelDRAW
Four vector formats dominate membrane keypad artwork. They are not interchangeable, and only two are routinely press-ready.
| Format | Extension | Minimum version | Layer support | Spot-colour support | Press-ready? | Notes |
|---|---|---|---|---|---|---|
| Adobe Illustrator | .ai |
CC 2018 or newer | Yes (named) | Yes (Pantone library) | Yes (native) | Industry default in North America and Western Europe |
| Adobe PDF/X-4 | .pdf |
ISO 15930-7:2020 | Yes (OCG) | Yes | Yes | Best transport format; locks fonts and transparency |
| Encapsulated PostScript | .eps |
Level 3 | No (flattened) | Yes | Yes (legacy) | Acceptable only when source is older than Illustrator CS6; loses layer names |
| CorelDRAW | .cdr |
X7 or newer | Yes (named) | Yes (Pantone bridge) | Yes | Common in Germany, Italy and Eastern Europe; always send a PDF/X-4 export alongside |
Flat raster formats — .jpg, .png, .tif, .bmp — are not acceptable as the master file. They lose vector scalability, kill spot-colour data, and force the pre-press operator to redraw legends from scratch, which adds 2 to 5 working days to the quote turnaround. A 600-dpi raster image is acceptable only as a placed element inside a vector master, never as the master itself.
The current best-practice combination is .ai (CC 2018+) as the source plus PDF/X-4 as the proofed transport file. This pair carries colour, layers, fonts-as-outlines and transparency through every modern RIP used in the industry.
§4 Pre-press specifications and standards
Tolerances on a membrane keypad are tighter than on a printed paper label because the overlay has to register against an embossed pillow, a die-cut window and an underlying circuit at the same time. The values below are what most ISO 9001-certified membrane switch suppliers will quote as their default acceptance criteria; tighter values can be agreed on a per-project basis.
| Parameter | Value (Imperial / Metric) | Reference / source |
|---|---|---|
| Bleed | 0.125″ / 3.18 mm on every printed edge | GRACoL 2013 / industry default |
| Trap (screen print) | 0.003″–0.005″ / 0.076–0.127 mm | ISO 12647-2 derived; supplier-specific |
| Registration tolerance — screen | ±0.010″ / ±0.254 mm | IPC-2221B artwork-master section |
| Registration tolerance — digital | ±0.005″ / ±0.127 mm | Vendor datasheet, digital UV inkjet |
| dE 2000 colour acceptance | ≤ 2.0 against approved Pantone draw-down | ISO 12647-2:2013 |
| Minimum positive line weight | 0.25 pt / 0.09 mm | Screen-mesh dependent |
| Minimum reverse / knockout line | 0.5 pt / 0.18 mm | Halftone fill-in risk below this |
| Minimum positive text | 5 pt | Sans-serif preferred |
| Minimum reverse text | 6 pt | Drop-out risk below this |
| Raster image resolution | 600 dpi at final size (300 dpi minimum) | Print-industry baseline |
| Edge keep-out from circuit traces | 0.150″ / 3.81 mm | Common supplier rule, edge-seal allowance |
| LED window registration to icon | ±0.005″ / 0.127 mm | LED back-lit overlay standard |
Pantone is the colour language of a membrane keypad
Screen-printed ink films behave differently than the CMYK process inks used in commercial print. A CMYK colour build that looks correct on a soft-proof can drift 5 to 10 dE units when laid down through a 305-mesh screen with thermo-cured ink. Pantone solves this by defining the target colour by physical reference, leaving ink mixing as the supplier’s task.
The rules are short and strict:
- Use the Pantone Solid Coated (PMS C) library for any colour applied over a polyester or polycarbonate substrate. Solid Coated values map to ink draw-downs that screen-print labs already maintain.
- Use Pantone Solid Uncoated (PMS U) only when the substrate is a textured uncoated film such as Autotex F157 with a matte finish.
- Never specify a Pantone Pastels & Neons colour for an outdoor or UV-exposed keypad — fluorescent pigments fade in months under direct sunlight.
- Where a corporate brand colour exists in CMYK only, request a Pantone bridge match from the supplier rather than guessing the closest PMS C.
- Reject any artwork file where colours are tagged “process” or “CMYK build” — those will not pass first-article colour approval against a dE 2000 ≤ 2.0 acceptance target.
§5 Pre-flight checklist and the 6 most common rejection reasons
Suppliers run a pre-flight check before tooling is cut. The following 12-point list mirrors the checklist used by most ISO 9001 membrane switch shops, and clearing it on the designer’s side typically removes the back-and-forth that adds 3 to 7 days to a project.
- [ ] Artboard size = mechanical-drawing trim size, 1:1 scale, units stated
- [ ] All printed colours defined as Pantone Solid Coated spot colours, named exactly
- [ ] 0.125″ / 3.18 mm bleed on every printed edge
- [ ] Trap 0.003″–0.005″ between adjacent spot colours
- [ ] Registration crosses placed 0.250″ outside trim at three corners
- [ ] All fonts converted to outlines / curves
- [ ] Layers named per supplier convention (
ARTWORK-COLOR-01,DEAD-FRONT,EMBOSS-*,DIE-CUT,WINDOWS,REGISTRATION,TITLE-BLOCK) - [ ] Die-cut outline on
DIE-CUTlayer, single closed path, 100% magenta spot - [ ] Minimum line weight 0.25 pt positive / 0.5 pt reverse respected
- [ ] Raster images placed at 600 dpi at final size
- [ ] 0.150″ / 3.81 mm edge keep-out between any graphic and outer trim
- [ ] PDF/X-4 export saved alongside native
.aior.cdr
The six most common rejection reasons mirror the most-skipped checklist items:
- File supplied as a flattened raster (.jpg / .png) instead of vector.
- Colours specified as CMYK or RGB instead of Pantone PMS C.
- Fonts left live, causing substitution at the supplier’s RIP.
- Layers merged or unnamed, forcing the pre-press operator to rebuild separations.
- No bleed, or bleed less than 0.125″, leaving white edges after die-cut.
- Die-cut outline drawn as part of the graphic layer rather than on its own spot-colour layer.
§6 Frequently asked questions
What file format should I send for membrane keypad artwork?
The preferred combination is an Adobe Illustrator file (.ai, CC 2018 or newer) as the editable source plus a PDF/X-4 (ISO 15930-7) export as the press-ready transport file. CorelDRAW X7+ (.cdr) is accepted in European supply chains. Raster formats such as .jpg, .png or .tif are not acceptable as the master file.
Why do membrane keypad suppliers require Pantone Solid Coated values instead of CMYK?
Screen-printed thermoset inks render colour differently from four-colour offset process inks. A CMYK build can drift 5 to 10 dE units once laid down on polyester. Pantone Solid Coated (PMS C) defines each colour by a physical ink draw-down, which maps directly to the supplier’s mixing recipe and to a dE 2000 ≤ 2.0 acceptance target under ISO 12647-2.
What bleed and trapping rules apply to graphic overlay printing?
A 0.125″ (3.18 mm) bleed should be applied on every printed edge of a membrane keypad overlay, and adjacent spot colours should be trapped 0.003″–0.005″ (0.076–0.127 mm). Three registration crosses sit 0.250″ outside the trim at the corners. Screen-print registration tolerance is ±0.010″; digital UV inkjet tightens to ±0.005″.
Should fonts be converted to outlines before sending artwork?
Yes. Every font in the file must be converted to vector outlines (Illustrator: Type → Create Outlines; CorelDRAW: Arrange → Convert to Curves) before export. A supplier’s RIP will not own commercial font licenses, and live type substitutes silently to a system font, breaking key legends and label spacing.
How are layers separated in a membrane keypad artwork file?
Each printed colour, plus dead-front mask, embossing, die-cut, windows, registration marks and title block, sits on its own named layer. Common names are ARTWORK-COLOR-01, DEAD-FRONT, EMBOSS-RIM, EMBOSS-PILLOW, DIE-CUT (100% magenta spot), WINDOWS, REGISTRATION and TITLE-BLOCK. Layers must never be merged.
What raster resolution is required for membrane keypad artwork?
When a true photographic image must be placed (a product photo on a panel, for example), the raster element should be 600 dpi at final print size. 300 dpi is the absolute minimum and only acceptable for non-critical secondary graphics. Vector should always be preferred over raster for text, icons and line work.
How is the dead-front (display window) mask supplied in artwork?
The dead-front sits on its own DEAD-FRONT layer as a 100% opaque black vector shape covering the LCD or LED segment area. When the display is off, that area looks identical to the surrounding overlay; when illuminated, the segments shine through the ink because dead-front ink is engineered for ~5% transmission at the chosen wavelength.
What are the most common reasons artwork is rejected by a membrane keypad supplier?
Pre-press teams report six recurring reasons: flattened raster instead of vector, CMYK or RGB colour instead of Pantone PMS C, live fonts not outlined, layers merged or unnamed, missing or insufficient bleed, and die-cut outlines drawn on the graphic layer instead of a dedicated DIE-CUT spot layer. Clearing the pre-flight checklist removes most of these in advance.
JASPER Electronics prepared the technical reference as a membrane keypad and graphic-overlay manufacturer serving OEM customers across North America, Western Europe and Asia. JASPER does not charge for pre-press artwork review on tooling-paid projects.
Ready to Start Your Project?
Tell us about your membrane switch, keypad, or graphic overlay requirements. Our engineering team will review your specifications and provide a detailed quote.