Every custom graphic overlay serves as both the visual brand identity and the primary environmental armor of an electronic device. When an industrial control panel returns from the field with scratched-off button labels, yellowed clear windows, or red warning borders that have faded to pale pink after one summer outdoors, the root cause is almost always top-surface printing or low-density digital ink laydown.
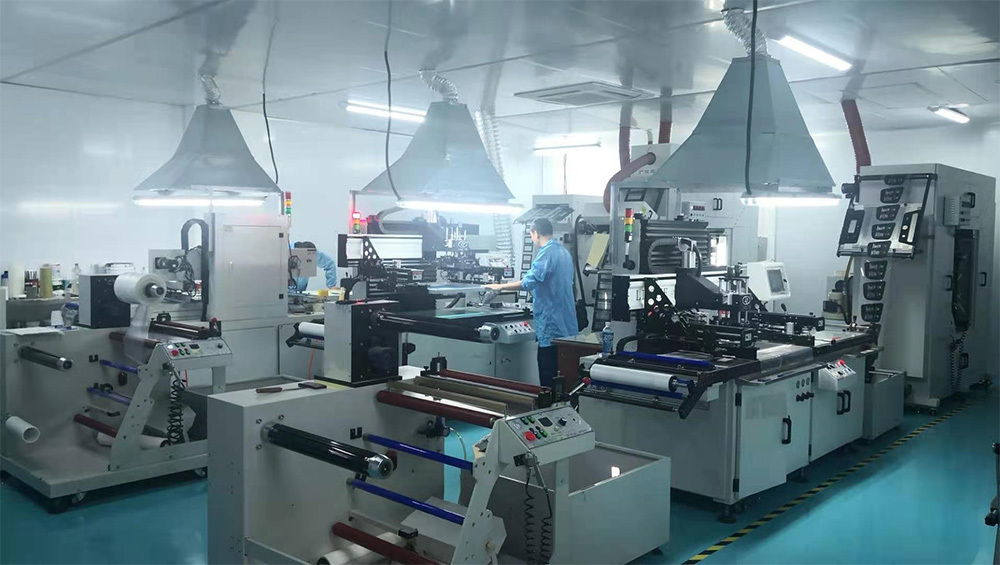
In our 2,500 m² Class 50,000 cleanroom, JASPER combines multi-pass Subsurface (Second-Surface) Screen Printing with high-resolution Digital UV Hybrid Printing across polyester, polycarbonate, and rigid acrylic panels. This engineering guide explains why subsurface printing is mandatory for industrial durability, how to specify ink opacity for dead-front windows, and when to combine digital CMYK gradients with screen-printed spot Pantone floods.
1. Why Subsurface (Second-Surface) Printing Never Wears Off
In commercial sticker printing, inks are deposited onto the top surface (First Surface) of the vinyl or plastic sheet. Even when protected by a thin clear varnish, repeated finger friction, fingernail gouging, and chemical wiping eventually abrade through the top ink layer.
In true industrial graphic overlays, we print all graphics in reverse order on the underside (Second Surface / Subsurface) of a transparent 0.150–0.250 mm hard-coated polyester (PET) or polycarbonate (PC) film:
- 100% Mechanical Armor Above the Ink: For an operator’s finger, screwdriver, or chemical wipe to touch the printed legend, it would have to wear completely through 0.20 mm (8 mil) of biaxially oriented polyester film first.
- Reverse Pass Layering Order: Pass 1 prints the translucent window tints (Red/Amber/Smoked) and finest text outlines directly against the rear of the clear film; Pass 2 lays down spot Pantone (
PMS) button colors; Pass 3 prints a high-opacity white backing layer (to keep colors vibrant); Pass 4 deposits an opaque black/silver light-blocking flood (OD > 3.5); and Pass 5 laminates the rear 3M 467MP/468MP pressure-sensitive adhesive directly onto the cured ink stack.
2. Subsurface Screen Printing vs. Digital UV Printing vs. Hybrid Production
Use the technical comparison table below to match the printing method to your graphic artwork and production volume:
|
Printing Parameter |
1. Subsurface Stencil Screen Printing |
2. Subsurface Flatbed Digital UV Printing |
3. JASPER Hybrid Process (Digital CMYK + Screen Flood) |
|
Wet Ink Film Thickness ( |
Thick ( |
Thin ( |
Optimal ( |
|
Color Matching Accuracy |
Exact Spot Pantone ( |
CMYK / 6-Color Process Simulation |
Best of Both |
|
Outdoor UV Lightfastness |
|
|
High when exterior areas use UV-stabilized screen inks behind Autotex XE film. |
|
Adhesive Shear & Peel Bond |
Superior |
Moderate |
Superior |
|
Setup Cost & Ideal Volume |
Moderate stencil setup ($40–$60/color); lowest unit cost above |
Zero screen setup; ideal for |
Ideal for medical/industrial panels featuring shaded 3D icons in production volumes. |
3. Preventing Red/Yellow Outdoor Fading and Adhesive Delamination Over Digital Ink
Two subtle chemistry traps ruin outdoor graphic overlays when manufacturers cut corners:
- Eliminating Fugitive Organic Red (
Warm Red / Rubine Red) and Yellow Pigments: Standard indoor red and yellow printing inks contain low-molecular-weight organic azo dyes that photodegrade into colorless compounds within 6 months of direct sunlight. For outdoor, marine, or agricultural panels, always specify Outdoor UV-Grade Pigments (Lightfastness Blue Wool Scale7–8) laminated behind UV-absorbing Autotex XE film from our Materials Center. - The
1.0 mmInk-Pullback Rule for Digital UV Prints: Because flatbed UV digital inks cure into a hard, low-surface-energy cross-linked acrylate skin, laminating 3M adhesive directly onto a 100% digital ink bleed edge can lead to edge delamination under thermal shock. When producing hybrid or digital prototypes, we inset the digital white layer 1.0 mm from the outer die-cut edge and seal the perimeter with high-adhesion screen-printed tie-coat primer.
|
Pre-RFQ DFM Checklist: 4 Artwork Rules for Flawless Graphic Overlays • [ ] Specify Exact Pantone Solid Coated ( • [ ] Maintain >= 0.15 mm Minimum Line Width and >= 0.20 mm Reverse Text Stroke: Keep negative/reverse text strokes at >= 0.20 mm (and font height >= 1.5 mm) so fine letters never fill in. • [ ] Add a 1.5 mm Bleed on All Background Color Floods: Extend background colors 1.5 mm past the outer die-cut outline so ±0.15 mm cutting tolerances never leave an unprinted clear sliver along the panel edge. • [ ] Specify Window Tint Percentage for Dead-Front and Display Cutouts: Note whether windows are 100% optically clear, 70% neutral smoke (for bright OLEDs), or 15% dead-front secret-until-lit. |
Frequently Asked Questions (FAQ)
Q1: Can JASPER match the exact brushed stainless steel or carbon-fiber look on a plastic graphic overlay?
Yes! We stock selectively brushed polyester/polycarbonate films and print subsurface metallic silver/graphite tints paired with selective matte/gloss UV surface textures—giving your panel the appearance of brushed anodized aluminum with zero metal machining cost.
Q2: Why do some clear display windows on graphic overlays look slightly hazy or rainbow-colored?
Window haze occurs when a manufacturer uses textured matte film without printing a refractive-index-matched UV clearing varnish on the window, while rainbow fringes (birefringence) happen when polarized LCD screens are viewed through stressed polyester at an angle. For color TFT/IPS displays with polarizers, specify optically isotropic polycarbonate or a PMMA Acrylic / Glass Cover Lens.
Q3: How do you verify ink adhesion on subsurface printed overlays?
Every production batch undergoes ASTM D3359 Cross-Hatch Tape Adhesion Testing (5B rating — zero ink square removal) on the cured subsurface ink stack before 3M adhesive lamination.
Upgrade Your Equipment’s Front Panel With JASPER
From 10-piece digital-hybrid prototypes to 50,000-piece screen-printed production runs, our cleanroom printing lines deliver razor-sharp legends and permanent 3M bonding. Explore our Custom Graphic Overlays or Request a Quote today.
Ready to Start Your Project?
Tell us about your membrane switch, keypad, or graphic overlay requirements. Our engineering team will review your specifications and provide a detailed quote.