
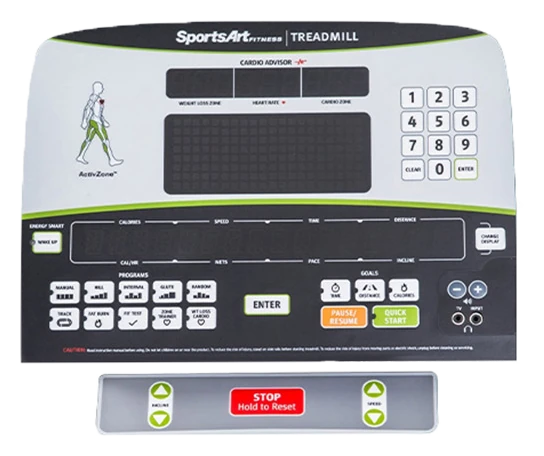
OEM FITNESS EQUIPMENT INTERFACES
Custom Treadmill Membrane Switches
Treadmill membrane keypads designed around repeated controls, backlighting, display windows, and console assembly.
JASPER is a custom membrane switch manufacturer for treadmill OEMs and authorized aftermarket programs. Send the key map, enclosure, connector, and duty requirements before tooling.
Quick answer
What is a treadmill membrane switch?
A treadmill membrane switch is a thin, sealed keypad assembly that converts presses on Start, Stop, speed, incline, and program keys into electrical signals for the console controller. A typical custom assembly combines a printed PET or PC graphic overlay, spacer and tactile layer, printed circuit or FPC, adhesive, display windows, and a flex tail or connector. For treadmill projects, the design must account for sweat and cleaning fluid paths, high-use keys, low-light readability, vibration, and the bend and strain placed on the tail during console assembly.
Best fit: custom OEM/ODM production and authorized aftermarket programs. This is not a catalog of single retail replacement keys for specific treadmill brands.
Failure prevention
Design around the treadmill console’s real failure paths.
A fitness equipment keypad should be specified from installed conditions, not from a generic membrane-switch data sheet.
| Field problem | Why it happens | Design response | Input needed |
|---|---|---|---|
| Sweat reaches the edge or key openings | Moisture can track into the circuit or adhesive interface. | Define a continuous perimeter seal, drainage direction, venting, and the console-level seal path. | Enclosure drawing, exposure zones, cleaning method |
| Start, Stop, speed, and incline wear first | These keys receive a different duty profile from program or setup keys. | Separate high-use keys in the validation plan and select dome, spacer, ink, and overlay construction accordingly. | Target actuations by key and acceptance criteria |
| Cleaning changes the graphic surface | Repeated wiping can attack ink, gloss, hard coat, or printed legends. | Name the actual cleaner and contact time so overlay material and print protection can be reviewed. | Cleaner list, wipe frequency, cosmetic limits |
| Users miss controls in dim gyms | Low contrast, glare, or uneven light makes quick adjustments harder. | Use selective LED or LGF backlighting, controlled windows, dead-front legends, and anti-glare finishes where needed. | Night appearance, voltage, color, dimming |
| The flex tail cracks or pulls loose | A tight bend, unsupported exit, or repeated service movement loads the conductor path. | Lock the tail exit, bend zone, connector orientation, stiffener, and service path during DFM. | 3D console data, PCB connector, installation sequence |
| The keypad feels inconsistent | Large overlays, curved consoles, preload, and local stack differences change perceived force. | Review key spacing, dome support, embossing, adhesive lands, and enclosure flatness as one stack. | Key force target, housing flatness, stack drawing |
Control hierarchy
Make urgent treadmill actions obvious before adding more functions.
Key size, spacing, tactile response, graphics, and lighting should follow task priority. A larger console is not automatically an easier console.
Safety and stop zone
Make Stop easy to locate through size, color, spacing, and tactile separation. The emergency-stop architecture remains an equipment-level safety decision outside the keypad alone.
Speed and incline adjustment
Pair up/down keys consistently, separate them from program controls, and validate frequent actuation under the installed overlay and housing preload.
Program and quick-select keys
Use clear grouping, durable legends, and optional embossing so users can change a workout without searching across the console.
Display and indicator area
Specify transparent or tinted windows, anti-glare finish, dead-front graphics, LED indicators, and the exact alignment to the LCD or LED module below.
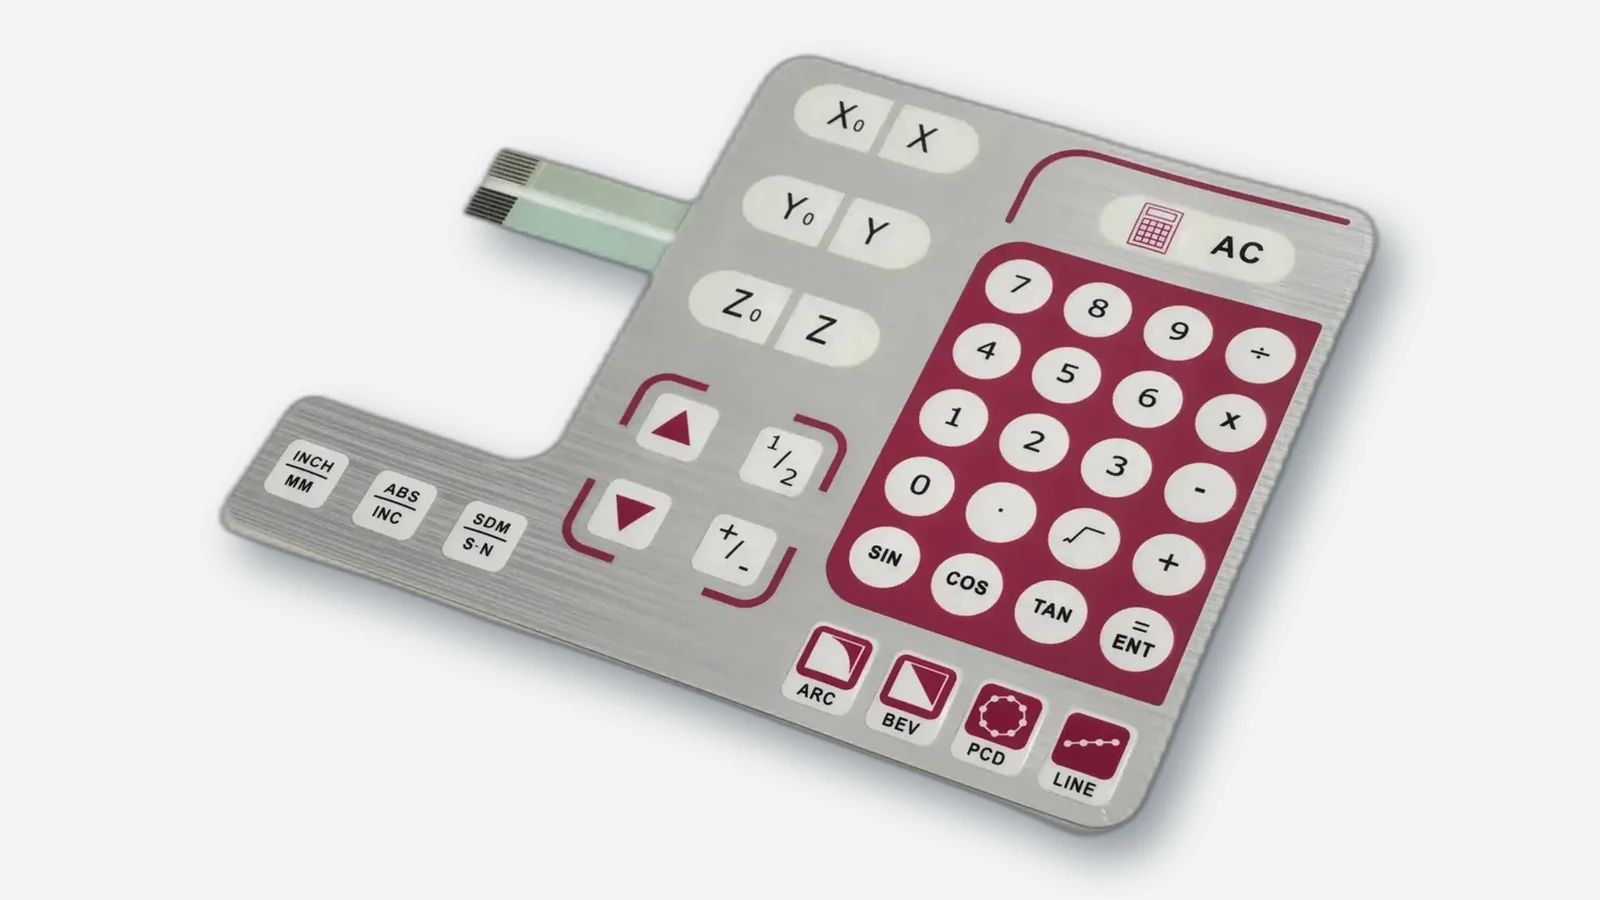
Construction options
Choose the stack from use conditions, not a default catalog build.
| Design area | Available routes | What the choice controls |
|---|---|---|
| Graphic overlay | PET or PC; matte, anti-glare, hard-coated, embossed, transparent, or dead-front zones | Sweat, cleaner, abrasion, readability, and brand graphics |
| Key response | Metal dome, polyester dome, non-tactile contact, or hybrid silicone key integration | Positive feedback, force consistency, noise, and package height |
| Circuit | Printed silver PET, FPC, or PCB-backed membrane keypad | Routing density, component integration, connector choice, and rigidity |
| Lighting | Discrete LEDs, LGF area lighting, status indicators, or no backlight | Night visibility, current budget, uniformity, and stack thickness |
| Display interface | Clear, tinted, textured, or dead-front window with controlled adhesive keep-out | Display contrast, glare, alignment, and cosmetic appearance |
| Environmental control | Perimeter adhesive, gasket strategy, venting, shielding, and console-level enclosure features | Moisture path, condensation, ESD/EMI needs, and serviceability |
| Tail and connector | Custom tail exit, pitch, exposed fingers, stiffener, ZIF/FFC or specified connector | Assembly access, bend radius, pull load, and PCB mating |
Fitness equipment coverage
One interface platform can support several console families.
Shared construction can reduce qualification work, while graphics, tail routing, key maps, and display windows change by model.
Treadmills and walking pads
Start/Stop, speed, incline, quick-select programs, safety-key status, and display windows.
Incline trainers and stair machines
High-frequency level controls, sweat exposure, vibration, and large-format console graphics.
Exercise bikes and ellipticals
Resistance controls, program selection, heart-rate display windows, and compact curved housings.
Rowers and strength consoles
Repeated interval controls, wipe-down cleaning, status indicators, and low-profile mounting.
First-article approval
Validate the sample as an installed treadmill control, not a loose keypad.
The approval plan should name the test input, installed configuration, and pass criteria. This turns broad claims such as durable or waterproof into project-specific evidence that production teams can repeat.
| Approval check | How to evaluate it | What acceptance should define |
|---|---|---|
| Installed key response | Mount the sample in the production-intent console with the actual bezel, adhesive land, and fastener preload. Exercise every key from its normal operator angle. | The key map, tactile response, electrical output, and release behavior meet the agreed drawing with no sticking, missed command, or unintended double input. |
| High-use key duty | Run Start, Stop, speed, and incline keys to the project-specific actuation target instead of applying one average duty to the entire keypad. | Contact behavior, force feel, graphics, embossing, and local stack remain within the agreed acceptance limits after the defined test sequence. |
| Sweat and cleaner exposure | Use the named sweat simulant or contamination condition, actual cleaner, concentration, contact time, and wipe frequency supplied by the equipment team. | No unacceptable edge lift, ink change, window haze, adhesive attack, or electrical ingress appears under the documented project criteria. |
| Day and night optical review | Evaluate legends, display windows, dead-front areas, indicators, and backlighting with the actual display module, voltage, dimming range, and console lighting. | Key groups remain readable without objectionable hotspots, halo, glare, window misalignment, or hidden legends at the approved viewing angles. |
| Tail and service assembly | Route the flex tail through the production housing, complete the intended bend, mate the production connector, and repeat the expected service movement. | The tail has controlled slack and support, the stiffener seats correctly, and no conductor, connector, adhesive, or enclosure interference is observed. |
From drawing to production
Approve the membrane keypad inside the console.
Installed validation catches preload, tail routing, window alignment, seal-path, and backlighting problems that a loose sample can hide.
Define the installed console
Send the key map, enclosure drawing or 3D data, display opening, PCB connection, cleaning agents, exposure zones, and annual volume.
Review the whole stack
DFM covers overlay material, high-use keys, dome support, seal path, backlighting, tail exit, connector, adhesive lands, and tolerance interfaces.
Approve an installed sample
The standard sample target is 15 working days after approved artwork. Evaluate the keypad in the actual console, not only as a loose part.
Release measurable criteria
Freeze artwork, dimensions, force targets, electrical limits, appearance standards, test method, and approved sample before production.
RFQ checklist
Send the information that changes construction and price.
Complete inputs reduce quote assumptions and make the first sample more useful.
- Console dimensions, housing material, and 2D/3D enclosure data
- Key map for Start, Stop, speed, incline, programs, and service functions
- Display, LED, indicator, and transparent-window locations
- Actual sweat, cleaner, temperature, UV, vibration, and ESD exposure
- Tactile force target and expected actuation duty by key group
- Backlighting method, voltage rail, color, brightness control, and night appearance
- Tail exit, connector type, pitch, mating PCB, bend zone, and assembly sequence
- Prototype quantity, annual volume, target date, and required compliance documents
Engineering FAQ
Treadmill membrane keypad questions
What is a treadmill membrane switch?
It is a custom low-profile keypad that combines a printed graphic overlay with a switching circuit and optional tactile domes, LEDs, backlighting, display windows, shielding, adhesive, and a flex-tail connection. It sends Start, Stop, speed, incline, and program commands to the treadmill console controller.
Can JASPER copy an existing treadmill membrane keypad from a sample?
For an OEM, equipment owner, or authorized aftermarket program, a physical sample can support construction review and dimensional reconstruction. A usable quote still needs ownership or authorization, connector and pin information, functional requirements, order volume, and acceptance criteria. JASPER does not present this page as a retail catalog of single brand-specific replacement keypads.
How do you protect a treadmill keypad from sweat and cleaning fluid?
Protection starts with a continuous perimeter seal and an enclosure design that does not direct liquid toward the tail exit or display opening. The selected overlay, ink protection, adhesive, venting, and gasket strategy must be reviewed against the actual cleaners and exposure pattern. Any final IP claim belongs to the tested assembled console, not the loose membrane switch by itself.
Should treadmill controls use tactile or non-tactile keys?
Tactile metal domes are useful for Start, Stop, speed, and incline because operators receive a clear response without watching the key. Non-tactile contacts can suit lower-use setup areas or extremely thin designs. Many treadmill consoles use a mixed layout based on key duty, package height, sound, and target force.
Can a treadmill membrane keypad include LEDs, LGF backlighting, and display windows?
Yes. Discrete LEDs can mark status or selected functions, while light guide film can spread light across larger key groups. Transparent, tinted, anti-glare, and dead-front windows can align with an LCD or LED display. The RFQ should define voltage, color, dimming, optical zones, stack depth, and masking artwork.
How long does a treadmill membrane switch last?
Service life depends on the high-use key duty, dome and circuit design, overlay construction, housing support, contamination, temperature, and cleaning method. Rather than using one generic life number, define the target actuations for Start, Stop, speed, and incline keys and agree on an installed validation method before production release.
What files are needed to quote a custom treadmill membrane switch?
Send a dimensioned drawing or 3D console model, artwork, key map, display and LED locations, circuit or pinout information, connector details, tail route, target force, environmental requirements, prototype quantity, and annual volume. Photos and a physical sample help when replacing an authorized legacy design.
Building or redesigning a treadmill console?
Send the console drawing, key map, display opening, tail connection, environment, and volume. We will identify the open construction decisions before tooling.
Start Treadmill Keypad DFM